
To master cappuccino frothing, you’ll need equal parts espresso, steamed milk, and microfoam. Start with cold whole milk for a creamy texture and maintain a temperature between 150°F and 155°F. Use a steam wand to inject air gently into the milk, creating silky microfoam. When pouring, blend the foam and coffee smoothly. Finally, keep your equipment clean for the best results. There’s so much more to learn about perfecting your technique!
Key Takeaways
- Start with cold whole milk in a stainless steel frothing pitcher for optimal texture and sweetness.
- Position the steam wand just below the milk surface to inject air, creating microfoam.
- Maintain milk temperature between 150°F and 155°F to enhance flavor and avoid bitterness.
- Aim for a 1:1:1 ratio of espresso, steamed milk, and froth for a balanced cappuccino.
- Clean equipment thoroughly after each use to ensure quality and maintain performance.

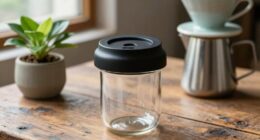
Milk Frothing Pitcher 350ml/600ml/900ml/1500ml (12oz/20oz/32oz/50oz) Steaming Pitchers Stainless Steel Milk/Coffee/Cappuccino/Latte Art Barista Steam Pitchers Milk Jug Cup with Art Pen,12oz
Perfect Combination Of Milk Frothing Pitcher And Latte Art Pen: The milk frother jug can be used in…
As an affiliate, we earn on qualifying purchases.
As an affiliate, we earn on qualifying purchases.
Understanding the Cappuccino Structure

Understanding the structure of a cappuccino is key to enjoying this classic coffee drink. A traditional cappuccino is served in a 5-7 oz cup and comprises equal parts espresso, steamed milk, and froth.
At the bottom, you’ll find 1/3 espresso, which provides a rich, bold flavor. Next, 1/3 steamed milk adds creaminess, balancing the drink. Finally, the top layer of 1/3 frothy milk foam creates a light texture that contrasts beautifully with the denser espresso and milk. This froth is thicker than what you’d find in a latte, thanks to more air being injected during steaming. It’s essential for holding its shape and supporting latte art while enhancing your overall cappuccino experience. Additionally, understanding the different brewing methods can help you appreciate the nuances of your cappuccino’s flavor profile. Many baristas also highlight the importance of quality espresso to achieve the perfect balance in your cappuccino. Furthermore, using essential oils for relaxation can enhance your coffee experience by promoting a calming environment. The antioxidants found in coffee can also contribute to an overall healthier beverage choice. The creamy texture of a cappuccino is similar to that of a well-made ice cream, making it a delightful treat for coffee lovers.

atatix Espresso Machine with Milk Frother, 20 Bar Pressure Espresso Maker, with 44OZ Removable Tank, Compact Stainless Steel Coffee Machine for Home, Office, Latte, Cappuccino, Macchiato, Silver
【Make Favorite Espresso Coffee by Yourself】The espresso machine with milk frother allows you to prepare all your favorite…
As an affiliate, we earn on qualifying purchases.
As an affiliate, we earn on qualifying purchases.
Essential Tools for Frothing

To create perfectly frothed milk for your cappuccino, you’ll need a few essential tools that can make all the difference.
A stainless steel frothing pitcher is vital; it retains heat and allows for precise control while steaming. The steam wand on your espresso machine is your primary tool, injecting steam into the milk to create that velvety microfoam. HEPA filtration is important for ensuring a clean environment, which can help enhance your cappuccino experience by reducing allergens in the air. Using a 2 slice toaster can also help you prepare the perfect side of toast to accompany your cappuccino. Additionally, keeping your equipment clean helps maintain the potency of the flavors in your cappuccino. Incorporating butter tools can further enhance your experience, especially if you’re considering adding a rich, creamy element to your beverage.
To guarantee your milk reaches the ideal temperature of 150-155°F without scorching, a thermometer is invaluable. If you don’t have an espresso machine, a milk frother or whisk can work as an alternative, though it may not yield the same consistency. Additionally, achieving color accuracy in your frothing technique can enhance the overall aesthetic of your cappuccino.
Finally, keep a damp cloth handy for cleaning the steam wand and a pitcher cleaner for maintaining your frothing pitcher’s hygiene.
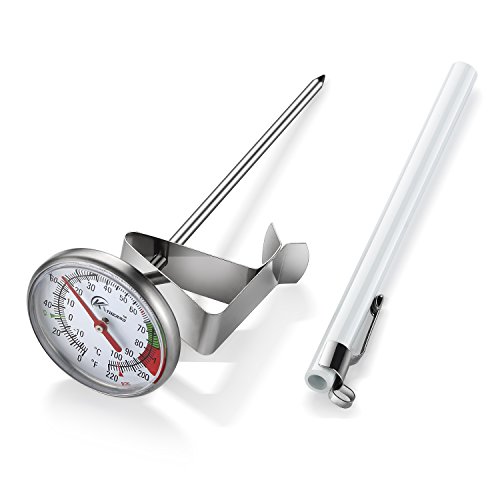
KT THERMO Instand Read 2-Inch Dial Thermometer,Best for The Coffee Drinks,Chocolate Milk Foam
DESIGN:Multi-stage design of the fixed clip, adjust the thermometer read the location of the disk surface to facilitate…
As an affiliate, we earn on qualifying purchases.
As an affiliate, we earn on qualifying purchases.
Choosing the Right Milk

When it comes to choosing the right milk for your cappuccino, the decision can greatly impact the drink’s flavor and texture. Whole milk is often the go-to choice, thanks to its natural sweetness and creamy texture, which enhance the overall experience. Additionally, using milk with higher fat content can contribute to a richer and creamier foam. Rooibos tea is also a great caffeine-free option if you’re looking for a soothing beverage to enjoy alongside your cappuccino.
While lower fat milks like 2% or skim can create a lighter foam by holding more air, they typically lack the richness you’ll find in whole milk. For an ideal balance, aim for a milk to espresso ratio of 1/3 espresso, 1/3 steamed milk, and 1/3 foamed milk. Moreover, incorporating chia seeds into your diet can also assist in weight management, which may be beneficial if you’re looking to balance your overall nutrition. Furthermore, the choice of milk can influence heating efficiency in your cappuccino-making process, as certain milk types froth better than others.
Keep in mind that whole milk requires less air during the frothing process, making it easier to achieve that perfect velvety foam. Additionally, experimenting with alternatives like almond or oat milk can also yield exciting results, as these options may provide unique user experience benefits that differ from traditional dairy.

51mm Espresso Tamper-Premium Barista Coffee Tamper Coffee Tamper Classic Series Stainless Steel Espresso Tamper Coffee Press Tool Tamper Espresso Handle, 90x51mm, Solid wood, Stainless steel
THE DIAMETER OF THIS TAMPER IS 51MM – please check that this will fit your filter basket before…
As an affiliate, we earn on qualifying purchases.
As an affiliate, we earn on qualifying purchases.
The Importance of Temperature

When it comes to frothing milk for your cappuccino, temperature plays an essential role. You want to keep the milk between 150°F and 155°F to enhance its natural sweetness while achieving that perfect texture. Get this right, and you’ll notice a significant difference in both flavor and presentation. Additionally, maintaining optimal air quality in your environment can further improve the overall experience of enjoying your cappuccino. The ideal temperature also helps to create a silky microfoam, which is crucial for espresso-based beverages. Properly frothed milk not only enhances taste but also contributes to the overall efficiency of your beverage preparation process. Furthermore, understanding the importance of personalized touches in your café environment can elevate your cappuccino experience even further. Ensuring that your coffee is sourced from sustainable brands can also enhance the ethical enjoyment of your beverage.
Ideal Frothing Temperature
Achieving the perfect froth for your cappuccino hinges on the ideal temperature of the milk, as it directly influences both sweetness and texture. The ideal frothing temperature for steamed milk is between 150°F to 155°F (65°C to 68°C).
Here are a few tips to help you reach that sweet spot:
- Monitor the temperature closely; avoid going beyond 160°F (71°C).
- Use a thermometer or temperature-sensitive pitcher for accuracy.
- Confirm the milk feels warm to the touch, not excessively hot.
- Focus on achieving a velvety microfoam quality, which is essential for a great cappuccino. Incorporating a low-carb meal option like a Turkey Bean and Tomato Zoodle Bowl can complement your cappuccino experience nicely. Additionally, keeping the milk at the right temperature helps to maintain its nutritional benefits, ensuring you enjoy a delightful beverage without sacrificing health.
Using the right tea kettle can help you control the temperature of the milk more effectively. Sticking to these guidelines will help you create a delicious and satisfying froth every time!
Milk Quality Influence
While you might think any milk will do for frothing, the quality of the milk you choose greatly impacts your cappuccino’s flavor and texture. For a good coffee experience, aim for whole milk, which has a higher fat content, creating that creamy microfoam essential for a velvety cappuccino.
The ideal steaming temperature is between 150°F to 155°F; this guarantees peak sweetness and a frothy consistency without scalding the milk. Heating above 160°F can lead to a burnt taste, ruining your drink.
Impact on Texture
The temperature at which you steam your milk directly affects its texture, impacting the overall quality of your cappuccino. Here’s what you need to know before you start pouring:
- Optimal Range: Aim for 150°F to 155°F for the best sweetness and texture.
- Avoid Overheating: Temperatures above 160°F can burn the milk, leading to bitterness.
- Microfoam Magic: Proper temperature control helps the milk hold air, creating the essential microfoam.
- Steaming Technique: Keep a rolling motion while steaming for a creamy texture; uneven heating can result in large bubbles.
If you’re going to make a great cappuccino, remember these tips, and in just two or three tries, you’ll nail that perfect froth!
Frothing Technique: Air Injection

To create the perfect froth using air injection, start with cold milk in your frothing pitcher, ensuring it’s the right size for your drink. Position the steam wand just below the surface at an angle to introduce air, creating a whirlpool effect. Inject air until the milk reaches around 100°F (38°C) before fully submerging the wand to heat it further. Aim for a light, silky texture with microfoam. Remember, too much air can lead to a dry, bubbly foam. Practice maintaining a consistent rolling motion while steaming to achieve even froth and prevent large bubbles from forming.
| Step | Action |
|---|---|
| Fill the pitcher | Use cold milk |
| Position the wand | Angle it just below the surface |
| Control air injection | Aim for microfoam, avoid dryness |
Steaming Milk for the Perfect Texture
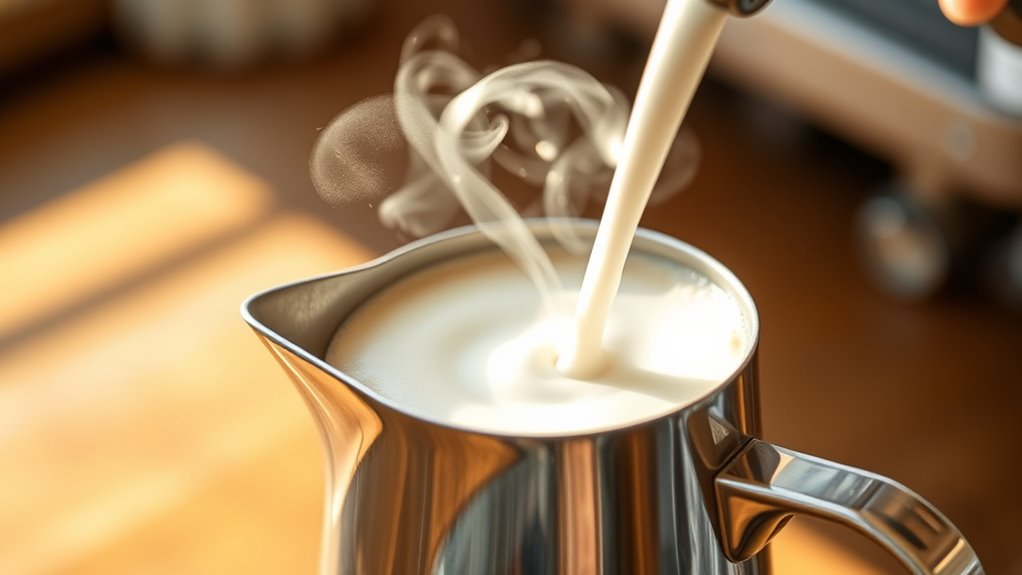
To steam milk for the perfect texture, start with cold milk in a cool frothing pitcher.
Position the steam wand just below the surface to inject air, warming the milk and creating that thick, frothy consistency.
Proper Milk Temperature
Achieving the perfect milk temperature is essential for steaming milk that enhances your cappuccino’s flavor and texture. Aim for a temperature between 150°F to 155°F (65°C to 68°C) to get that smooth, silky texture.
Here are some tips to help you master this:
- Thermometer Use: Invest in a reliable thermometer to monitor your milk temperature accurately.
- Hand Test: If you don’t have a thermometer, hold the pitcher; it’s ready when it’s too hot to touch for more than a second.
- Avoid Overheating: Steaming beyond 160°F (71°C) can lead to a burnt taste and loss of sweetness.
- Practice: Consistently steaming will sharpen your skills for the ideal temperature and texture.
Air Injection Technique
Now that you’ve mastered the proper milk temperature, it’s time to focus on the air injection technique, which plays an essential role in creating the perfect texture for your cappuccino.
Start with cold milk in a cool frothing pitcher; use a 12 oz pitcher for drinks under 7 oz and a 20 oz pitcher for drinks between 7-12 oz.
Position the steam wand tip just below the surface to inject air, listening for a consistent hissing sound. Keep injecting air until the milk reaches around 100°F (38°C), then submerge the wand deeper to heat it further.
Maintain a rolling motion while steaming to achieve a uniform texture, avoiding large bubbles. Your goal is a thick, velvety foam that enhances your cappuccino.
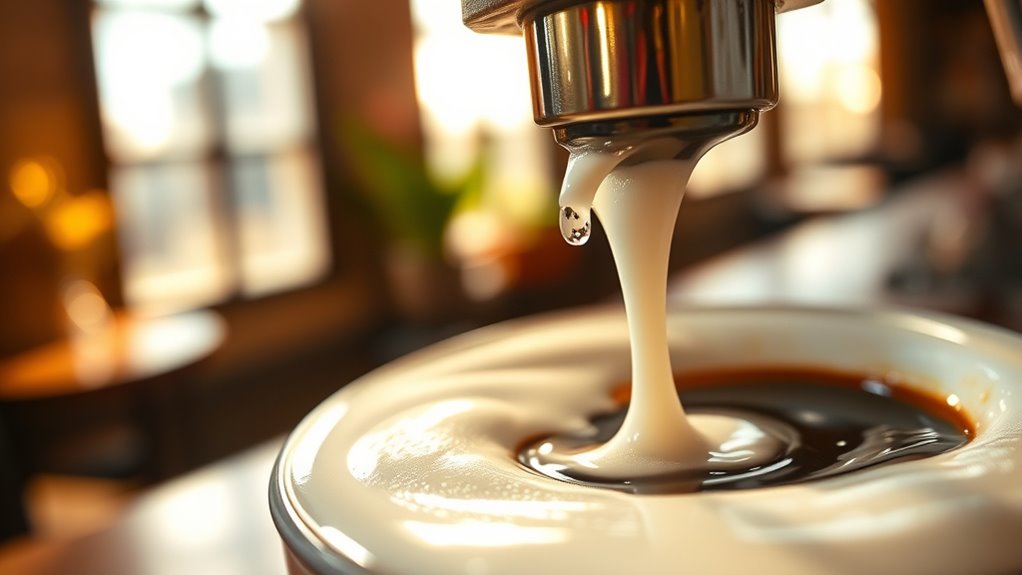
Pouring Techniques for Cappuccino

Mastering the art of pouring a cappuccino can elevate your coffee experience.
Elevate your coffee experience by mastering the art of pouring a cappuccino.
To pour like a pro, follow these steps:
- Fill the Center: Start by pouring the foam into the center, leaving a coffee rim around the edge for contrast.
- Avoid Designs: Skip the intricate designs; cappuccino foam’s thicker texture doesn’t hold shapes well.
- Start Low: Begin pouring from a low position to allow the foam to rise, then lift the pitcher higher for a cascading effect.
- Swirl and Flow: Maintain a consistent flow while swirling the pitcher to blend the foam and liquid, creating a balanced texture.
Tips for Achieving Ideal Foam

To create the ideal foam for your cappuccino, focus on the milk’s temperature and texture during steaming. Aim for a milk-to-espresso ratio of 1:1:1 to balance flavors and textures perfectly.
Start by injecting air into cold milk for about 5-10 seconds before submerging the steam wand. This helps create that thick, velvety foam you want. Use a smaller frothing pitcher, around 12 oz, for drinks under 7 oz to optimize frothing.
Maintain a rolling motion while steaming to develop microfoam, which gives your cappuccino its light and airy texture.
Finally, always wipe the steam wand and purge it after use to keep it clean and ready for your next frothing session. Enjoy your perfect cappuccino!
Cleaning and Maintaining Your Equipment

After perfecting your cappuccino frothing technique, keeping your equipment clean is just as important for consistent results.
Here are some essential cleaning steps to follow:
- Purge the steam wand before and after each use to eliminate water or condensation that could affect milk texture and flavor.
- Wipe the steam wand with a clean, damp cloth immediately after use to prevent milk residue buildup, avoiding bacterial growth.
- Clean the frothing pitcher regularly with warm soapy water and rinse thoroughly to prevent flavor transfer.
- Deep clean weekly by soaking removable parts in a solution designed for espresso machine maintenance and check for any worn parts to guarantee peak performance.
Following these steps will keep your equipment in top shape for frothing perfection!
Frequently Asked Questions
How to Froth Milk Properly for a Cappuccino?
To froth milk properly for a cappuccino, start with cold milk in a cool pitcher.
Position the steam wand just below the surface to inject air, warming the milk for about 10-15 seconds.
Focus on creating thicker foam by allowing longer air injection.
Maintain a rolling motion while steaming for an even texture.
After steaming, swirl the milk to eliminate large bubbles, ensuring a smooth pour and a well-defined foam layer on top.
What Common Mistake Should Be Avoided When Frothing Milk?
When frothing milk, think of it as crafting a masterpiece; every detail matters.
One common mistake you should avoid is starting with warm milk in a hot pitcher. This can lead to poor texture and overheating.
Also, don’t forget to purge your steam wand before use. Neglecting this can ruin your froth.
Finally, remember to keep the milk moving for even heating—stationary steaming just won’t cut it for that velvety finish!
How to Milk Frothing for Beginners 5 Tips?
To master milk frothing, start with cold whole milk in a cool pitcher.
Inject air by positioning the steam wand tip near the surface for 5-10 seconds, creating that thick froth.
Then submerge the tip to heat the milk evenly.
Aim for a balanced ratio of 1/3 espresso, 1/3 steamed milk, and 1/3 froth.
Always purge the steam wand before and after use to keep your equipment clean and guarantee great results.
What Is the Ratio of Steamed Milk to Milk Foam for a Cappuccino?
Imagine you’re at your favorite café, enjoying a perfectly crafted cappuccino.
For a traditional cappuccino, the ratio of steamed milk to milk foam is 1:1. This means that for every ounce of steamed milk, you’d use an equal ounce of milk foam.
Conclusion
By mastering cappuccino frothing basics, you’re not just making a drink; you’re creating an experience that brings people together. Did you know that studies show enjoying coffee with friends can boost your mood by 40%? So, when you perfect your frothing technique and share that delicious cup, you’re not only savoring rich flavors but also fostering connections. Embrace your skills, enjoy the process, and spread joy with every cappuccino you serve!