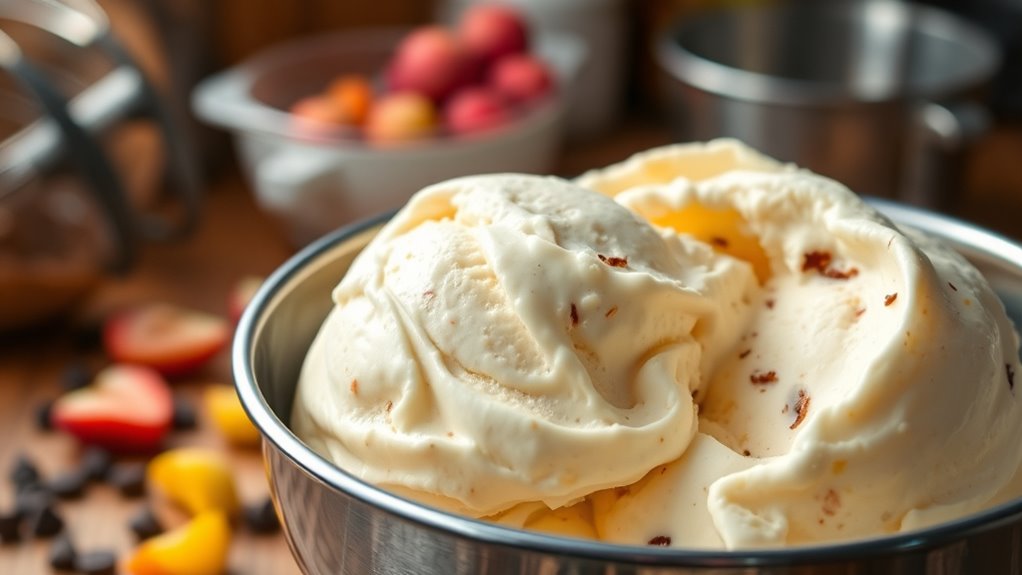

To make perfect ice cream at home every time, start with high-quality ingredients and carefully select your flavors, experimenting with combinations for richness. Use a reliable ice cream maker to guarantee smooth texture, and transfer the churned ice cream into airtight containers, smoothing the surface and sealing tightly. Store it in the coldest freezer section to prevent ice crystals, and let it sit at room temperature before serving. Keep exploring these tips for consistently delicious results.
Key Takeaways
- Use high-quality, fresh ingredients and natural flavorings for vibrant, authentic flavors.
- Transfer ice cream to airtight containers immediately and store at or below 0°F (-18°C) to preserve texture.
- Minimize ice crystal formation by sealing tightly, covering surface with plastic wrap, and maintaining consistent cold temperatures.
- Incorporate layered or blended flavors and experiment with aromatic enhancements to boost complexity and presentation.
- Invest in a reliable ice cream maker and follow proper storage techniques for smooth, creamy results every time.
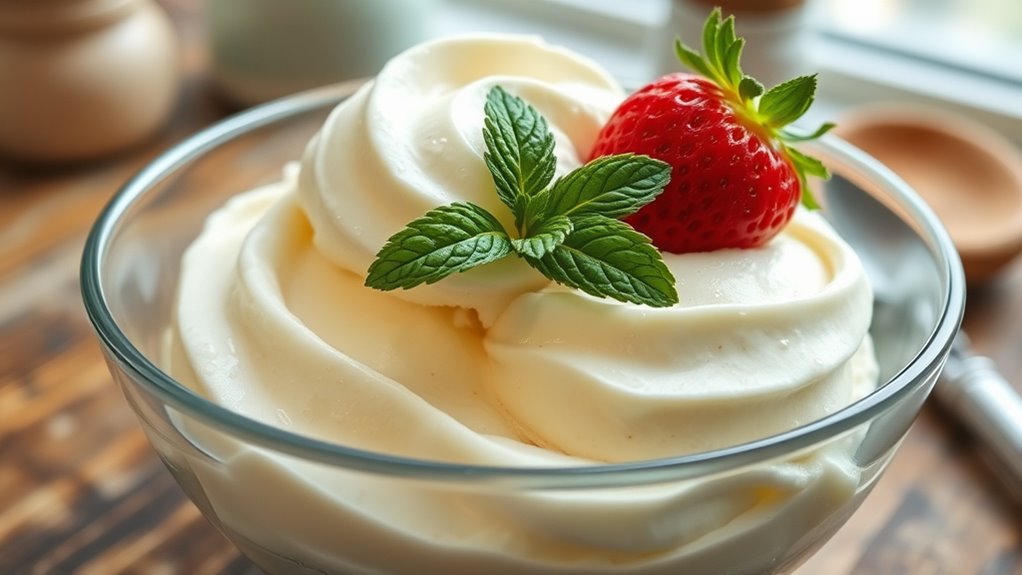
Making perfect ice cream at home is easier than you might think, especially with the right techniques and ingredients. The key to a delicious batch starts with choosing the right ice cream flavors. Whether you prefer classic vanilla, rich chocolate, fruity strawberry, or inventive combinations like lavender honey or salted caramel, selecting quality ingredients makes all the difference. Fresh fruit purees, natural extracts, and high-quality dairy help create vibrant, authentic flavors that shine through in every scoop. Remember, the flavor is the foundation, so don’t skimp on ingredients or settle for artificial flavorings. Once you’ve decided on your ice cream flavors, it’s essential to focus on proper ice cream storage. After churning, transfer your ice cream to an airtight container, smoothing the surface with a spatula to eliminate air pockets. This helps prevent ice crystals from forming, which can ruin the texture. Store your ice cream in the coldest part of the freezer, ideally at or below 0°F (-18°C), and keep it covered tightly. Proper storage preserves the flavors and maintains a creamy consistency, making sure your ice cream stays fresh and scoopable for longer periods. It’s also helpful to place a piece of plastic wrap directly on the surface before sealing the container; this minimizes the formation of ice crystals and keeps your ice cream tasting just as good as when you first made it. When you’re ready to serve, let the ice cream sit at room temperature for a few minutes to soften slightly, which makes scooping easier and enhances the flavor experience. If you’re experimenting with different ice cream flavors, consider creating a tasting plan by blending complementary flavors or layering different types for a more complex dessert. Keep notes on what works best so you can replicate your favorites or improve on your recipes. Remember, consistency in storage and attention to ingredient quality are what will elevate your homemade ice cream from good to great. Investing in a good ice cream maker with a reliable churn cycle can also help achieve a smoother texture and better incorporation of flavors. Additionally, incorporating essential oils with natural flavors can add unique aromatic notes to your ice cream, elevating the overall sensory experience. To further improve your process, understanding ice crystal formation can help you minimize undesirable textures. Understanding AI-powered flavor development can also inspire innovative combinations and improve your recipe creation process. Ultimately, making perfect ice cream at home isn’t just about the recipe; it’s about understanding how to preserve and present it. Proper ice cream storage ensures your creation stays delicious, while experimenting with different ice cream flavors keeps your dessert game exciting. Keep in mind that storage techniques play a crucial role in maintaining quality over time. With these tips, you’ll enjoy perfectly creamy, flavorful ice cream anytime you want—no fancy store-bought options required.

Cuisinart Ice Cream Maker Machine, 2-Quart Ice Cream, Sorbet and Frozen Yogurt Machine, Fully Automatic Double-Insulated Freezer Bowl Makes Frozen Desserts in Under 30 Minutes, ICE30BCP1, Silver
- Large 2-Quart Freezer Bowl: Holds ample frozen treats
- Fully Automatic Operation: Makes desserts in under 30 minutes
- Stainless Steel Design: Durable and stylish construction
As an affiliate, we earn on qualifying purchases.
As an affiliate, we earn on qualifying purchases.
Frequently Asked Questions
Can I Make Dairy-Free Ice Cream at Home?
Yes, you can definitely make dairy-free ice cream at home. By using dairy alternatives like coconut milk, almond milk, or soy milk, you create a creamy base perfect for your favorite flavors. Plus, there are plenty of vegan options that taste just as delicious. Simply blend your chosen dairy-free ingredients with sweeteners and flavors, then freeze. It’s easy, customizable, and perfect for satisfying your ice cream cravings without dairy.
What’S the Best Way to Prevent Ice Crystals?
Ironically, preventing ice crystals might seem as tricky as avoiding the cold in winter. To do so, you should regularly stir your mixture during freezing, which improves texture enhancement and prevents large ice crystals. Using alcohol or sugar helps preserve flavor, too. Cover your ice cream tightly to avoid moisture exposure. These steps guarantee each scoop is smooth, flavorful, and irresistibly creamy, giving you perfect homemade ice cream every time.
How Long Should I Churn Homemade Ice Cream?
You should churn your homemade ice cream for about 20 to 30 minutes, depending on your machine’s power. This churning time helps incorporate air and break up ice crystals, resulting in smooth texture. Keep an eye on the freezing duration; once it reaches a soft-serve consistency, transfer it to the freezer for additional firming. Proper churning guarantees your ice cream stays creamy and delicious every time.
Can I Add Mix-Ins During Freezing?
You might worry that adding mix-ins during freezing will ruin your ice cream, but with proper freezing techniques, it’s totally doable. For best results, fold in your mix-ins during the last few minutes of churning or after the ice cream is partially frozen. This mix-in timing guarantees they stay evenly distributed without sinking or clumping. Just avoid adding too early, and you’ll get a delicious, well-textured treat every time.
What’S the Ideal Storage Method for Homemade Ice Cream?
To store your homemade ice cream, choose an airtight ice cream container to prevent freezer burn. Keep your freezer temperature at around 0°F (−18°C) for ideal preservation. After scooping, press a piece of plastic wrap directly on the ice cream’s surface before sealing the container. This prevents ice crystals and keeps your ice cream fresh, creamy, and ready whenever you crave a treat.
Conclusion
Now that you know the secrets to making perfect ice cream at home, there’s no reason to settle for store-bought anymore. With just a little effort and patience, you can create a dessert so delicious, it’ll make even the most seasoned ice cream connoisseur jealous. Think of your freezer as a magic portal where simple ingredients transform into a scoop that’s creamier than clouds and more delightful than a summer sunset. Happy scooping!