
Yes, making ice cream without a machine really works. You simply freeze your mixture in a shallow container, then stir vigorously every 30 to 45 minutes to break up ice crystals and keep it creamy. Using substitutions like coconut milk or adding alcohol can improve softness. With patience and consistent stirring, you’ll get delicious, scoopable ice cream anytime. Keep exploring these techniques to perfect your homemade frozen treats.
Key Takeaways
- Yes, homemade ice cream without a machine can be creamy with proper freezing and stirring techniques.
- Using a shallow container and stirring every 30-45 minutes mimics churning, preventing large ice crystals.
- Ingredient substitutions and adding alcohol can improve texture and softness without specialized equipment.
- Consistent stirring during freezing breaks up ice crystals, ensuring a smooth, scoopable consistency.
- Patience and experimentation with ingredients and techniques lead to successful homemade ice cream without a machine.

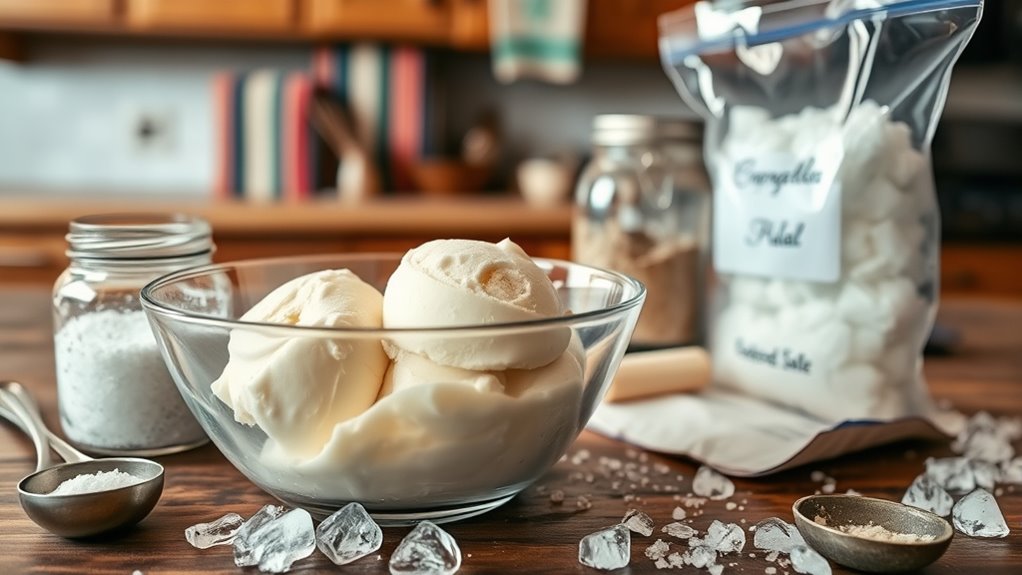
Making ice cream at home doesn’t require a fancy machine; with a few simple ingredients and some basic techniques, you can create delicious, creamy treats anytime. One of the key aspects of DIY ice cream is mastering freezer techniques. To achieve that smooth, scoopable texture, you need to pay attention to how you freeze your mixture. After blending your ingredients, pour the mixture into a shallow container. This increases the surface area, helping it freeze faster and reducing ice crystal formation. Every 30 to 45 minutes, take the container out and stir vigorously with a fork or whisk. This process, called churning by hand, mimics the action of an ice cream machine, breaking up ice crystals and ensuring silky consistency. Consistency is crucial, so don’t skip this step. Over time, your mixture will thicken and develop that creamy texture you crave.
Ingredient substitutions are also flexible, allowing you to customize your ice cream based on what you have on hand or dietary needs. For example, if you don’t have heavy cream, you can substitute with full-fat coconut milk or evaporated milk for richness. Instead of sugar, honey or maple syrup work well, adding sweetness along with unique flavors. For flavoring, fresh fruits, cocoa powder, or vanilla extract can be added directly to the mixture. If you’re looking for a dairy-free option, plant-based milks like almond, cashew, or oat milk can replace traditional dairy ingredients. These substitutions won’t compromise the texture too much, especially if you follow proper freezer techniques to prevent large ice crystals. Keep in mind that some substitutions, like using less fat, might result in a slightly less creamy consistency, but that’s easily remedied with a bit of patience during freezing and stirring.
Another tip is to use an alcohol-based ingredient, such as a splash of liqueur or vodka, because alcohol doesn’t freeze solid and can help keep the ice cream softer. Just remember to add it sparingly—too much can prevent freezing altogether. Whether you’re using dairy or plant-based ingredients, the key is balancing the mixture well before freezing. Once you get the hang of it, you’ll find that making ice cream without a machine is not only doable but also fun and adaptable. You can experiment with flavors and ingredients, adjusting the freezer techniques as needed for the perfect texture. With a bit of patience and creativity, you’ll be enjoying homemade, creamy ice cream in no time—no fancy equipment required.
handheld ice cream churner
As an affiliate, we earn on qualifying purchases.
As an affiliate, we earn on qualifying purchases.
Frequently Asked Questions
Can You Make Dairy-Free Ice Cream Without a Machine?
Yes, you can make dairy-free ice cream without a machine. By using dairy alternatives like coconut milk, almond milk, or cashew cream, you create a creamy base. Simply blend your chosen dairy-free ingredients with flavor variations like fruit or cocoa, then freeze the mixture. Remember to stir every 30 minutes to prevent ice crystals, and you’ll have delicious dairy-free ice cream ready to enjoy, all without a machine!
How Long Does Homemade Ice Cream Last in the Freezer?
When it comes to ice cream storage, you’re playing with fire if you leave it in the freezer too long. Typically, homemade ice cream lasts about 1 to 2 months in the freezer’s lifespan. To keep it tasting its best, store it in an airtight container and avoid frequent thawing and refreezing. After that, it may develop freezer burn or lose its creamy texture, so enjoy it while it lasts!
Is There a Way to Prevent Ice Crystals From Forming?
To prevent ice crystals and enhance texture, you should regularly stir your homemade ice cream during freezing. Using a mixture of sugar and alcohol can lower the freezing point, reducing ice crystal formation. Adding a bit of fat or stabilizers also helps maintain a smooth texture. Cover your ice cream tightly with plastic wrap or a lid, and store it at a consistent temperature to keep it creamy and prevent ice crystal buildup.
Can You Add Mix-Ins During the Freezing Process?
Imagine your ice cream as a canvas, waiting for your personal touch. You can definitely add mix-ins during freezing, like a painter adding vibrant strokes. Use freezing techniques carefully—stirring occasionally helps distribute mix-ins evenly and prevents ice crystals. Just fold in your mix-ins gently near the end of freezing to keep textures intact. Your patience transforms simple ingredients into a masterpiece, filled with delightful surprises in every bite.
What Are the Best Storage Containers for Homemade Ice Cream?
When storing your homemade ice cream, choose airtight containers to keep it fresh and prevent freezer burn. Silicone molds are a great option for smaller portions or fun shapes, making serving easy and mess-free. Make certain to cover your ice cream tightly in the container or mold to avoid ice crystals and maintain flavor. Proper storage ensures your homemade treat stays delicious and ready whenever you crave it.

ZICOTO Set of 2 Reusable Ice Cream Tub Containers 2 Quart Each – Perfect for Homemade Sorbet, Frozen Yogurt Or Gelato – Stackable Storage Containers, Stickers And Lids Stores Easily In Freezer
Perfect For Homemade Ice Cream & More: The ice cream tub set of 2 is a great way…
As an affiliate, we earn on qualifying purchases.
As an affiliate, we earn on qualifying purchases.
Conclusion
So, can you really make ice cream without a machine? The answer might surprise you. With a little patience and some simple tricks, you could be enjoying creamy, homemade ice cream in no time. But wait—there’s one secret step that could make all the difference. Ready to find out? Grab your ingredients and give it a try—you might just discover a new favorite way to satisfy that sweet tooth. The best part? The magic is in your hands.

HOTEC Heat Resistant 600℉ Food Grade Silicone Rubber Spatula Set for Baking, Cooking, and Mixing Non Stick Dishwasher Safe BPA-Free Multicolor Set of 5
[ HIGH QUALITY ] : 100% made of Food Grade Silicone Material. Low Carbon and Environmentally Friendly Non-toxic,…
As an affiliate, we earn on qualifying purchases.
As an affiliate, we earn on qualifying purchases.
alcohol for softening ice cream
As an affiliate, we earn on qualifying purchases.
As an affiliate, we earn on qualifying purchases.