This guide provides clear instructions for students to select, set up, and brew coffee using a portable coffee maker. It is designed for beginners seeking a quick caffeine fix during busy days. Follow these steps to ensure a smooth brewing process and enjoy fresh coffee wherever you are.

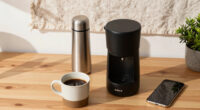
Elite Gourmet EHC113M Personal Single-Serve Compact Coffee Maker
- ✔ Power: 600 Watts
- ✔ Capacity: 14 oz
- ✔ Material: Stainless Steel (interior travel mug)

Elite Gourmet EHC111A Personal Single-Serve Compact Coffee Maker Brewer with 14oz Stainless Steel Travel Mug
- ✔ Power: 600 Watts
- ✔ Brew Capacity: 12 oz
- ✔ Travel Mug Capacity: 14 oz

Tastyle Single Serve Coffee Maker for K Cups and Grounds
- ✔ Brew Size: 6 to 12 Oz
- ✔ Power: 120V, 800W
- ✔ Water Tank Capacity: 12 Oz
Difficulty: Beginner | Time: 10-15 minutes
What You’ll Need
Tools & Materials:
- Portable coffee maker
- Filtered water
- Coffee grounds or pods
- Power source or batteries (if required)
- Travel mug
Knowledge:
- Basic understanding of coffee brewing
- Familiarity with the coffee maker’s operation
Read the coffee maker’s manual for specific features or instructions. Ensure the device is charged or has fresh batteries if applicable.

Elite Gourmet EHC113M Personal Single-Serve Compact Coffee Maker, Mint
- Universal design with travel mug: Includes 14oz stainless steel travel mug
- Waste-reducing and eco-friendly: No paper or plastic cups needed
- Fast brew time: Brew coffee in under 60 seconds
As an affiliate, we earn on qualifying purchases.
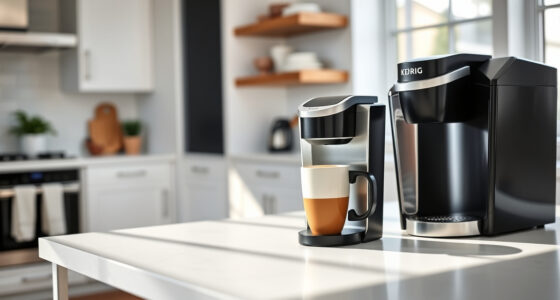
Elite Gourmet EHC113M Personal Single-Serve Compact Coffee Maker
This model stands out for its remarkable fast brewing time of under 60 seconds, making it perfect for students rushing in the morning. Its compact design and included 14 oz stainless steel travel mug make it highly portable. However, its limited capacity means you’ll need to brew multiple times for larger needs, and it only works with coffee grounds, not pods. The base isn’t dishwasher safe, which could be inconvenient for frequent use.
Pros:
- Fast brewing under 60 seconds
- Includes reusable filter and travel mug
- Space-saving, portable design
Cons:
- Limited to 14 oz capacity per brew
- Requires coffee grounds, no pod compatibility
- Base is not dishwasher safe
Best for: Students needing quick coffee in small spaces or on tight schedules
Not ideal for: Those who prefer pod coffee or larger quantities in one brew
Bottom line: A top pick for students who value speed and portability but don’t need large quantities of coffee at once.
“A top pick for students who value speed and portability but don’t need large quantities of coffee at once.”
Elite Gourmet EHC111A Personal Single-Serve Compact Coffee Maker Brewer with 14oz Stainless Steel Travel Mug
Compared with the B0B41D4PR1, this model offers a slightly smaller 12 oz brew capacity but maintains the same quick under 60 seconds brew time. Its single-touch operation and included 14 oz stainless steel travel mug make it highly user-friendly for students who want straightforward coffee at the push of a button. Its main limitation is the absence of an automatic shut-off feature, which could lead to energy waste or safety concerns.
Pros:
- Fast brewing in under a minute
- Includes durable stainless steel mug
- Simple one-touch operation
Cons:
- Limited to 12 oz brew size
- No automatic shut-off
- Only grounds, no pods
Best for: Students seeking quick, reliable coffee with minimal fuss
Not ideal for: Those who want larger brew sizes or pod compatibility
Bottom line: Ideal for students who prioritize ease of use and quick coffee without fuss, but watch out for capacity limits.
“Ideal for students who prioritize ease of use and quick coffee without fuss, but watch out for capacity limits.”
Tastyle Single Serve Coffee Maker for K Cups and Grounds
This pick offers the most versatility, allowing brewing with both K cups and ground coffee. Its compact, portable design with a built-in handle makes it perfect for camping, travel, or small dorm spaces. The 3-minute brew time is longer than the previous two, but this is a fair trade for the flexibility of pod use and its easy-clean features. Power requirements at 100V could be a downside if you don’t have a compatible power bank or converter.
Pros:
- Compatible with K cups and grounds
- Compact and portable with handle
- Self-cleaning and safety features
Cons:
- Longer brew time (around 3 minutes)
- Limited to 12 oz capacity
- Requires a power bank or converter if not in 100V region
Best for: Students who want versatility and travel-friendly features in one machine
Not ideal for: Those who need very fast brewing or larger capacity
Bottom line: Best suited for students who value flexibility and portability over speed, but be prepared for longer brewing times.
“Best suited for students who value flexibility and portability over speed, but be prepared for longer brewing times.”
As an Amazon Associate we earn from qualifying purchases.
Before You Start
Check the compatibility of your portable coffee maker with your brewing preferences and power options. Make sure you have clean water and coffee supplies ready. Avoid using hard water if your device is sensitive to mineral buildup.
Step-by-Step Instructions
Step 1: Prepare your workspace and gather supplies
Set up your portable coffee maker on a flat, stable surface. Collect all necessary supplies: water, coffee, mug, and power source. Ensure your hands are clean to prevent contamination.
Tip: Use filtered water for better taste and to prevent mineral buildup in the device.
Check: All supplies are within reach and the workspace is ready with the coffee maker clean and positioned securely.
Step 2: Fill the water reservoir
Open the water compartment of the coffee maker and pour in the measured amount of water for your desired coffee strength. Do not overfill beyond the maximum fill line.
Tip: Use bottled or filtered water if your tap water is hard or tastes off.
Check: Water is filled to the correct level without spillage and the reservoir is securely closed.
Step 3: Insert coffee grounds or pod
Place the appropriate coffee grounds into the filter basket or insert the coffee pod, depending on your machine’s design. Do not overpack the filter.
Tip: Use medium grind coffee for optimal extraction; for pods, ensure they are properly seated.
Check: Coffee is correctly placed, and the filter or pod is securely fitted in the machine.
Step 4: Power on the coffee maker
Connect the device to a power source or insert batteries if applicable. Turn on the machine using the power button or switch.
Tip: Check that the device is plugged in firmly or batteries are installed correctly.
Check: Machine powers up with indicator lights or signals showing it is ready to brew.
Step 5: Start the brewing process
Press the brew button or switch to begin brewing. Wait for the coffee to finish; most devices will signal completion with a light or sound.
Tip: Do not open the lid or remove the mug during brewing to prevent spills or incomplete extraction.
Check: Brewing completes without leaks, and coffee starts flowing into the mug.
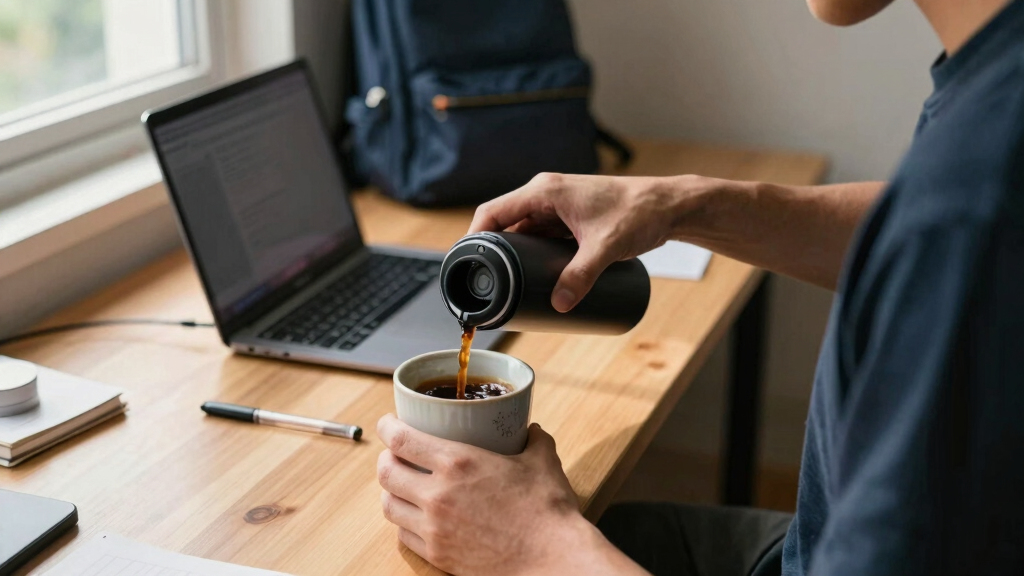
Step 6: Remove and enjoy your coffee
Once brewing stops, carefully remove the mug or pour the coffee into your preferred travel mug. Turn off the machine and clean any used parts.
Tip: Allow the coffee to cool slightly before drinking to avoid burns.
Check: Coffee is hot, fresh, and securely in your mug, ready to consume.
Common Mistakes to Avoid
- Overfilling the water reservoir — Always fill water to the marked maximum level to prevent spillage or overflow.
- Using incorrect grind size for coffee grounds — Use medium grind coffee for most portable machines to avoid clogging or weak flavor.
- Not securing the filter or pod properly — Ensure the filter basket or pod is firmly seated to prevent leaks and ensure proper brewing.
- Running the machine without water — Double-check the water reservoir is filled before starting the brew cycle.
Troubleshooting
Problem: Coffee is weak or watery
Solution: Use more coffee grounds or a finer grind, and ensure enough water is added for the desired strength.
Problem: Device does not turn on
Solution: Check power connections, replace batteries if needed, or ensure the device is fully charged.
Problem: Coffee leaks during brewing
Solution: Confirm that the filter or pod is installed correctly and that all parts are securely fitted.
Problem: Coffee tastes bad or burnt
Solution: Clean the machine regularly, use fresh water, and avoid overpacking the filter.
What Success Looks Like
The coffee maker brews hot, flavorful coffee into your mug without leaks or spills. The machine operates smoothly, and the coffee meets your taste expectations.
Next Steps
After use, clean the removable parts according to the manufacturer’s instructions. Store the device in a dry place. Repeat the process as needed for fresh coffee during busy days or when on the go.
Frequently Asked Questions
How much water should I use for a single cup?
Use the amount specified in your coffee maker’s manual, typically 6-8 ounces for a standard cup. Do not exceed the maximum fill line.
Can I use coffee pods in all portable coffee makers?
Not all models support pods. Check your device’s specifications to see if pods are compatible or if you need to use ground coffee.
How do I clean my portable coffee maker?
Remove all detachable parts, wash with warm soapy water, and wipe the exterior. Descale periodically if mineral buildup occurs, following the manufacturer’s instructions.